Upload Workout Videos
Uploading workout videos ensures users have access to a curated collection of fitness content. Admins can follow the steps below to efficiently upload videos to the platform.
⚙️ Prerequisites
-
File Naming Convention
- The video file name must:
- Be in lowercase
- Use underscores (
_) instead of spaces - Do not use any special characters like
#,&,%,$,@,<,>,—, etc.
- Example:
❌intermediate_strengthworkout#1_week_1
✅intermediate_strength_workout_1_week_1
- The video file name must:
-
Description Format Rules
- When writing the workout description, avoid special characters such as:
—, $, %, <, >, #, @, &, *etc. - Only plain text, letters, and numbers are allowed.
- When writing the workout description, avoid special characters such as:
-
Thumbnail Image Upload Requirements
When uploading an exercise thumbnail, please ensure the image meets the following criteria:
- Maximum File Size: 500–600 KB
- Recommended Dimensions: 1500 × 1000 pixels
- Format: JPG or PNG
- Exercise Title Character Limit Update
- The exercise title field in WGER now supports a maximum of 40 characters. This means that only titles within this character limit can be uploaded successfully.
- Therefore, when adding a new exercise, the exercise name must be structured and written carefully to ensure it fits within the allowed character count.
-
Video Size Limitation (Important)
- The maximum recommended video size is 2 GB.
- Uploads under 2 GB will process and encode much faster.
- Files larger than 2 GB can take significantly longer to upload and process, especially during HLS encoding.
- To ensure smooth uploads and playback, compress or trim the video before uploading if it exceeds 2 GB.
- ⚠️ Note: Always check the file size before uploading to avoid timeouts or failed uploads.
-
Disk Space Check (for Multiple Uploads)
- If you plan to upload multiple videos or large files, please check the available disk space with the DevOps/Infra team before proceeding.
- Uploading multiple high-resolution videos without checking disk space may cause the upload to fail or slow down the server.
🪜 Step-by-Step Guide
Step 1: Log in to the Product Owner Dashboard
- Go to the Recipe Product Dashboard
- Log in using Product Team credentials
Step 2: Navigate to the Workout Upload Section
- On the dashboard, click the top-right corner button
- Select "Workouts" to open the upload interface

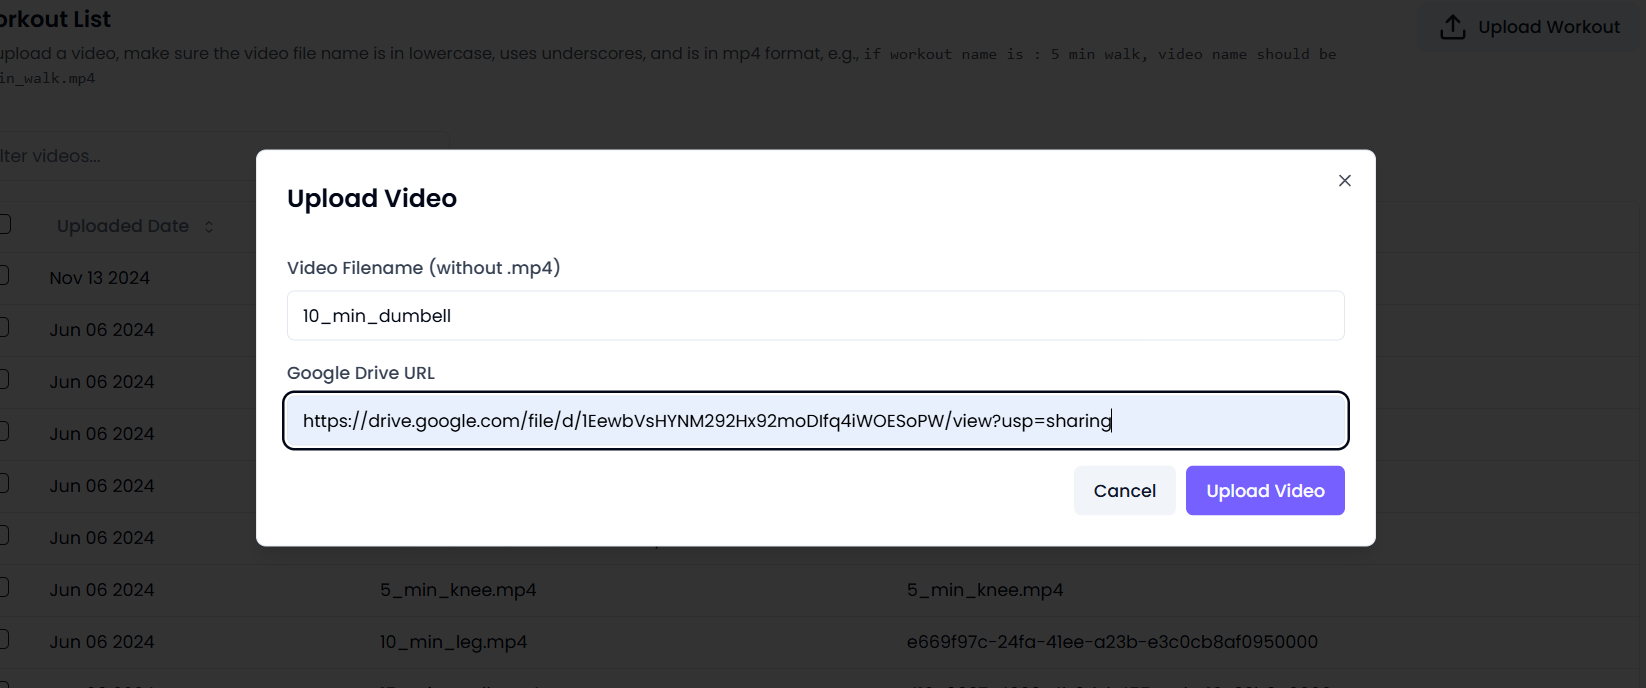
Step 3: Upload the Workout Video
-
Enter the Workout Title
- Type or paste the exercise name (e.g.,
"5 Min Walk") - The system will automatically format it to:
✅5_min_walk.mp4
- Type or paste the exercise name (e.g.,
-
Paste the Shareable Video Link
- Copy and paste the public shareable link from Google Drive
-
Before Uploading:
- Double-check that your video file is below 2 GB in size.
- For multiple uploads, confirm available disk space with the DevOps team.
-
Click "Upload"
- Wait until the upload process is complete
- Upload time varies based on file size —
- Under 2 GB → Fast (Recommended)
- Above 2 GB → Slow or may timeout
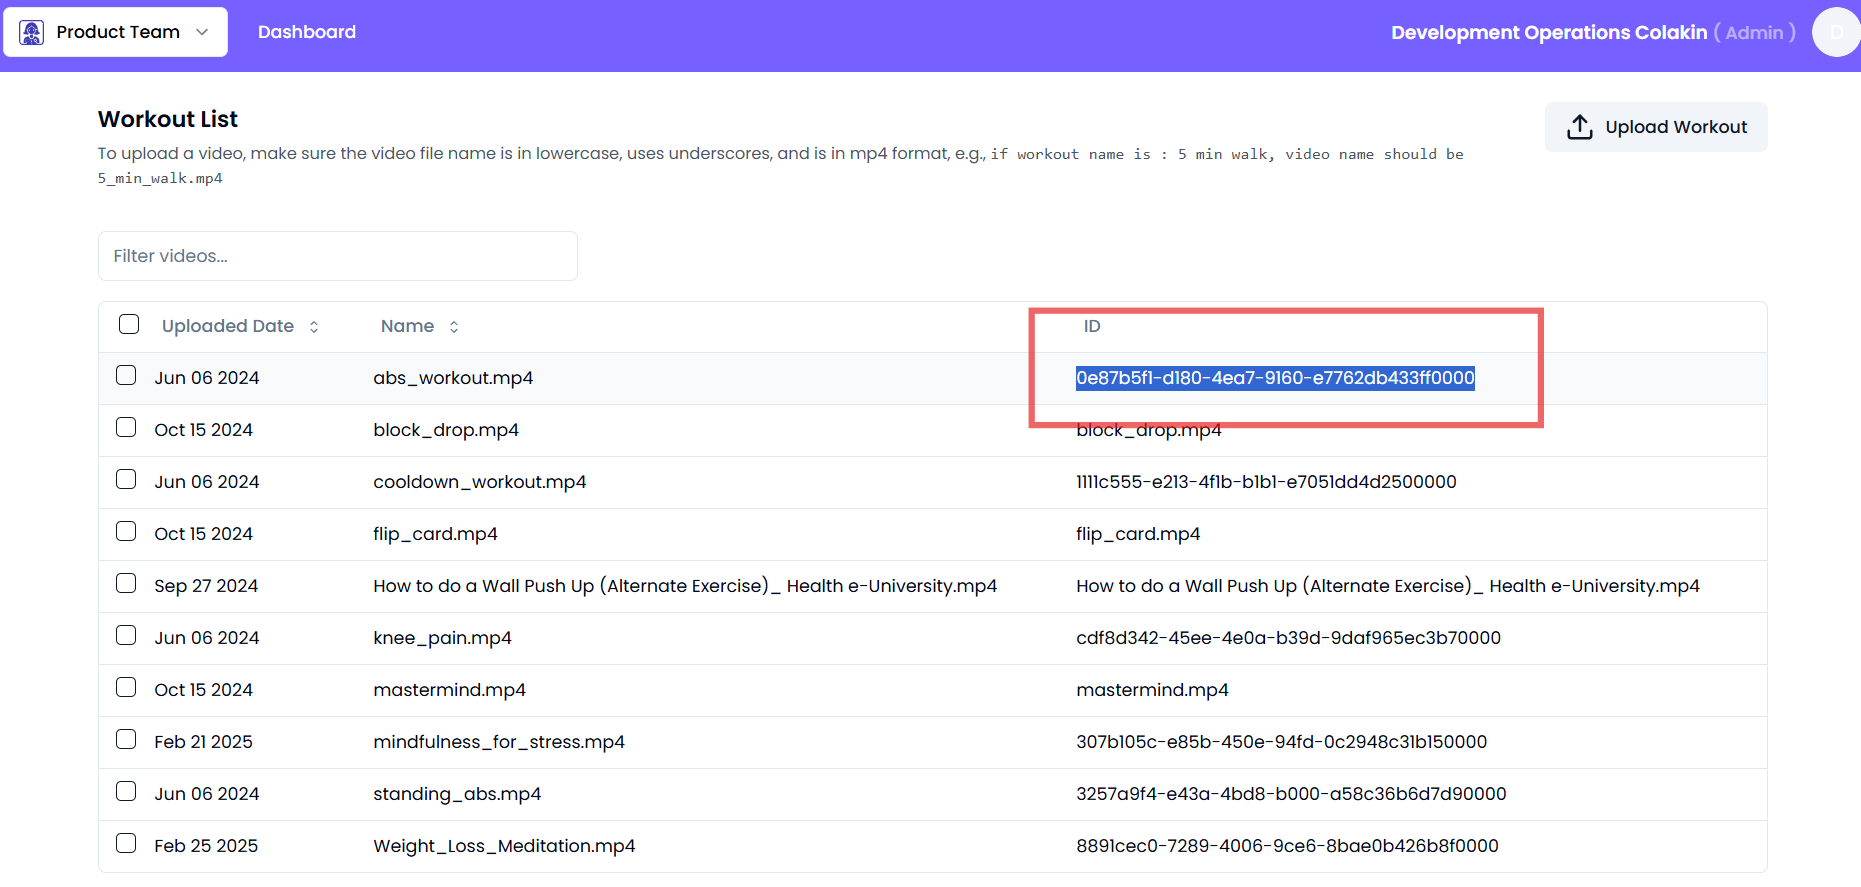
Step 4: Copy the Video ID
- After upload, an ID will be generated
- Copy the Video ID for further use
Step 5: Update the Workout Description
- Open the Wger Workout section
- Locate the relevant exercise
- If needed, translate the details to English
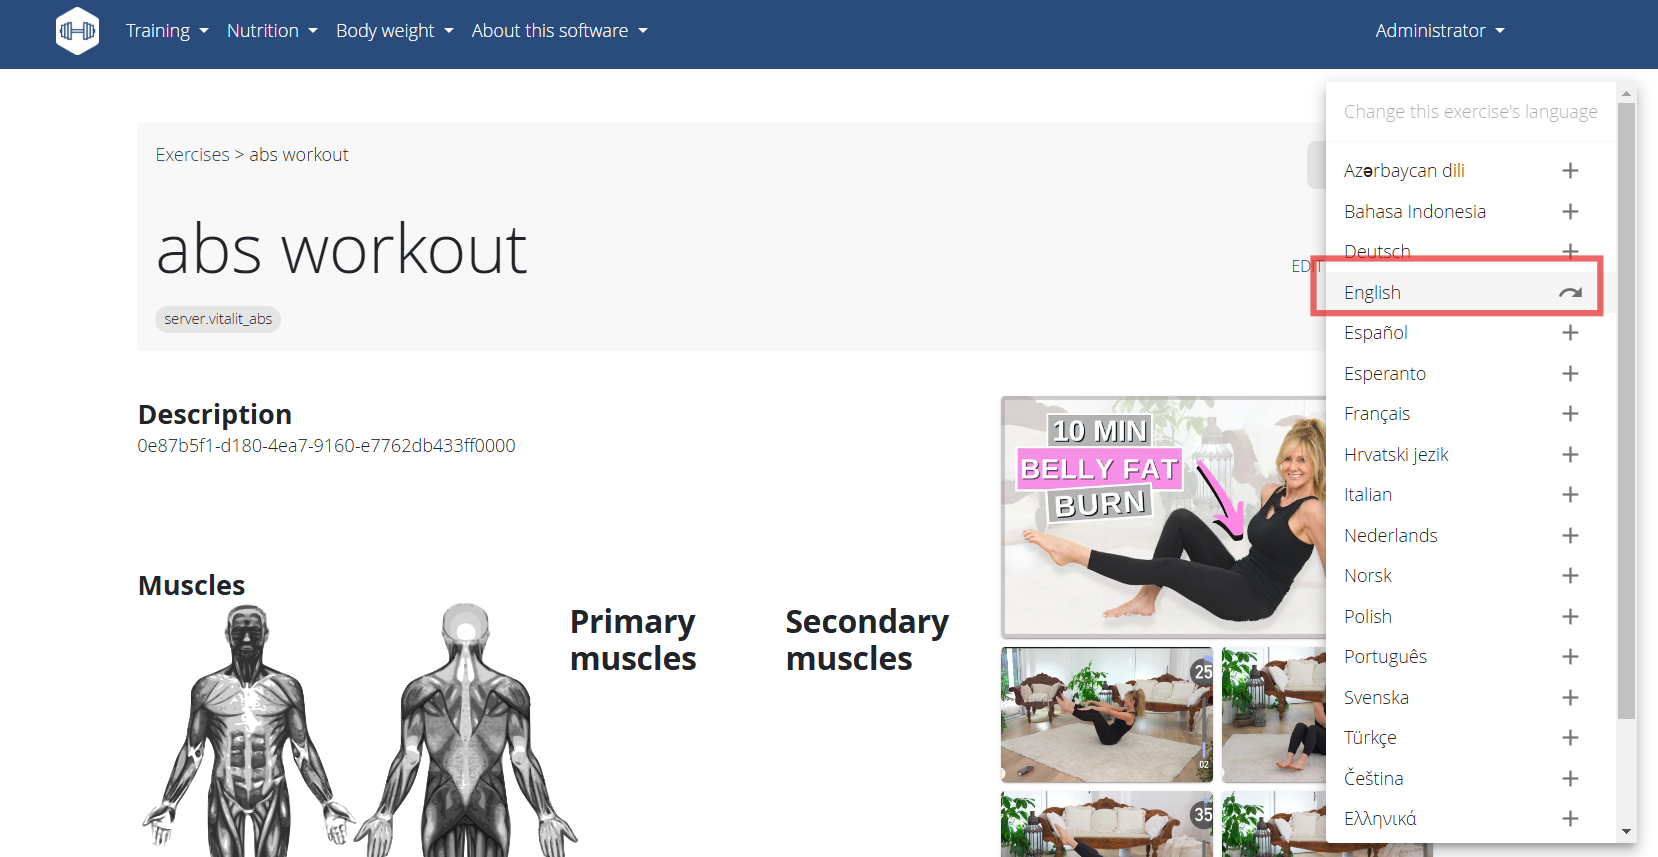
- Click Edit → Description
- Update the field using the format below:
{
  "video_id": "your_video_id_here",
  "description": "A brief description of the workout"
}
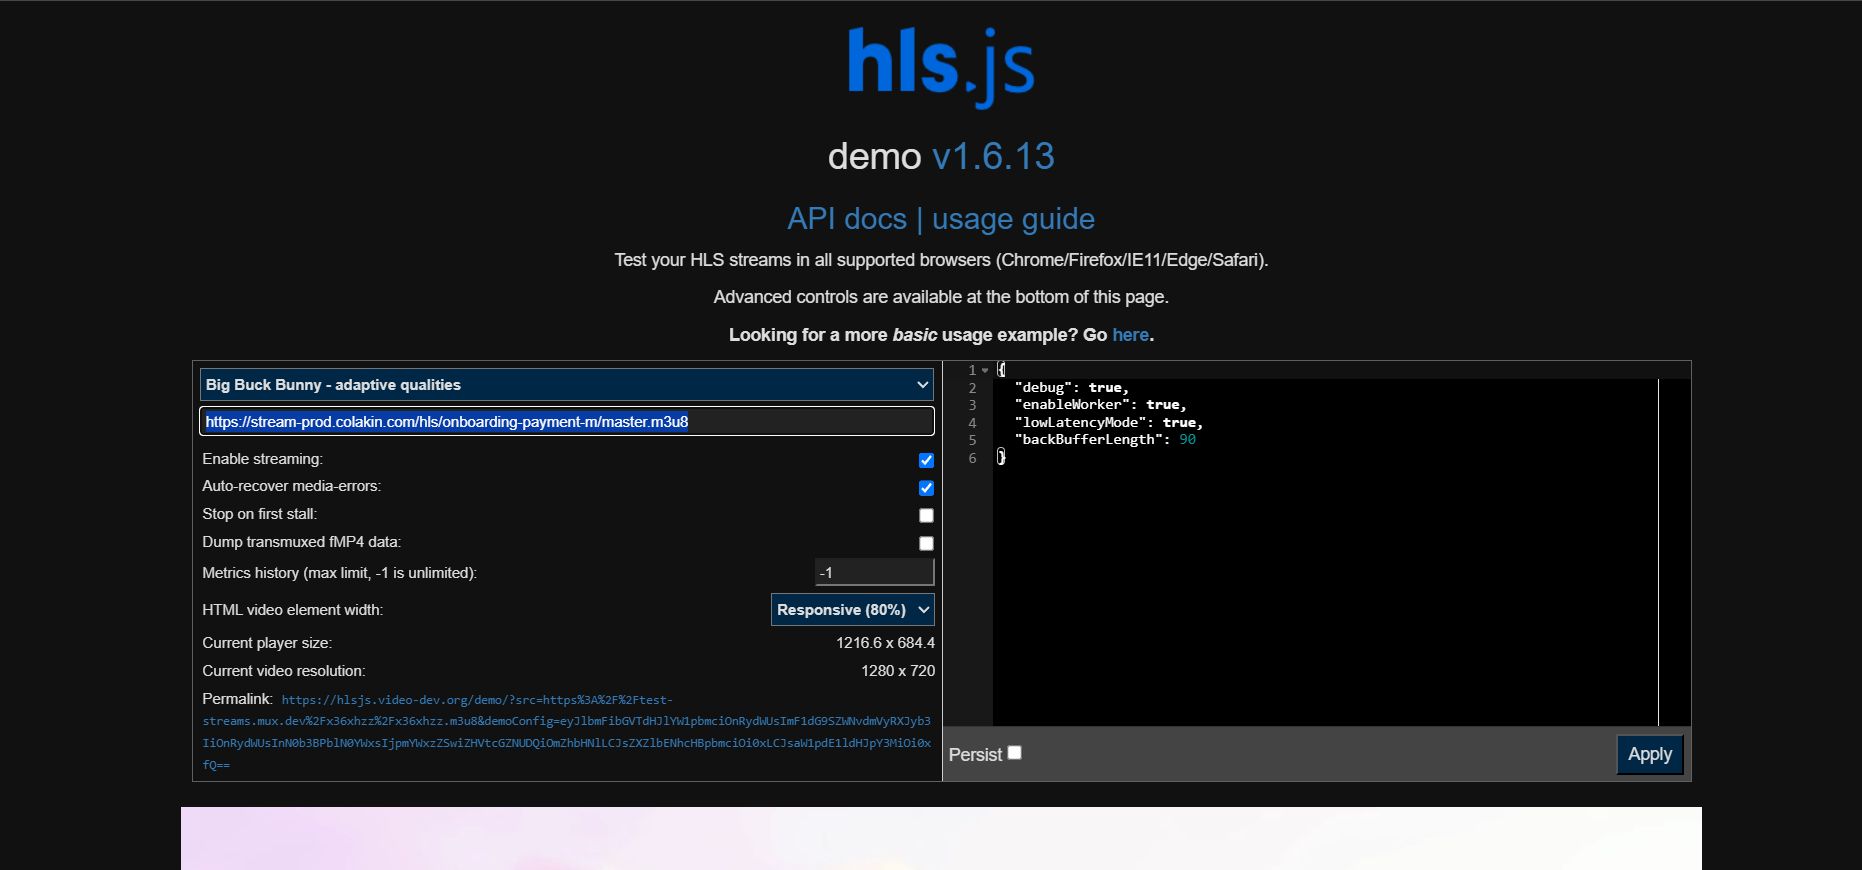
✅ Step 6: Verify Video Upload via HLS
Once the video is uploaded, verify if it’s playing correctly using the HLS demo site.
-
Open this HLS testing link: 🔗 https://hlsjs.video-dev.org/demo/
-
Get the HLS link structure from your uploaded video.
-
The base format is:
https://stream-prod.colakin.com/hls/{video_id}/master.m3u8
-
-
Example:
https://stream-prod.colakin.com/hls/onboarding-payment-m/master.m3u8 -
Choose the "Big Buck Bunny - adaptive qualities" format to play the video.
-
Replace
{video_id}with your actual uploaded ID, paste it into the HLS demo URL field, and click Apply. -
If the video plays correctly, it means the upload was successful and properly encoded on the server.